


Crispy, Crunchy, Colourful Kakiage
Crispy, Crunchy, Colourful Kakiage
A beautiful, simple type of tempura. Give them a go! Easy to enjoy by mixing your choice of different vegetables in small batches for delicious, crunchy flavour.

Kakiage are really popular in Japan, they look like little crispy onion bhajis, and there’s a reason for that, as I’ve recently found out.
Kakiage means 'mixed frying' - not such a poetic name! Some say it originates from the word kakimazeru meaning 'mixing up'. Little fried nests of vegetables, these have been described as pancakes. That's a little misleading, as they’re not usually flat and should have some airy volume to them.
Kakiage are a wonderful chance to use seasonal vegetables. I’ll often have a main ingredient, like burdock or green beans perhaps, but then use up leftover vegetables to bulk them out. Carrots, onions, peppers work well.
Seafood will appear in kakiage too, to vary the texture and flavour. Little morsels of prawns or scallops are my favourite, but to be honest, I normally just stick to veg. I love the play of textures that kakiage gives, as the tops remain crispy and the underside tends to soak up the flavours of the soba or udon soup that it's served upon.
Once you’ve made a batch, you can easily serve them with rice AKA Kakiage Don, or soba or udon. I tend to go fairly safe in terms of portion size, one or two each is plenty as this is a fried food after all and they can be a little heavy to digest. I’ve found, in writing this and experimenting with different batches, that rice flour makes a kakiage that is lighter on the stomach. It will also have plenty more crunch. Something to do with the amount of oil the rice flour absorbs being less.
Kakiage were the very first type of tempura made in Japan. I like the idea that these were an early stage, primitive style tempura. There's a dish called Peixinhos da horta from Portugal, which I've tried out during recent trips to Lisbon and Tavira (such a beautiful town in the south of Portugal). Peixinhos are gorgeous and very lightly battered. Rumour has it that this is a more modern version of the dish that was introduced by traders and missionaries in the 16th Century to Japan. I love that the name translates as "Little Fish from the Vegetable Garden". The portuguese version is made with wheat flour and often made using fresh green beans.
I've also read that tempura could have been brought to Japan by those same portuguese visitors but via Goa, in the form or influenced by bhajis and pakora. This is certainly believable when I think about onion bhajis. Although they are made using a different flour, the similarities are clear. It’s exciting to read that bhajis, normally made with chickpea (gram) flour they are also often made with buckwheat flour. Going to give this a go for my next batch of kakiage, to see how it compares with rice flour.
Sliding the little portions of battered vegetables into the oil, take care not to splash yourself. This is a critical moment and it is easy for them to break up or separate. I sometimes use a little square of parchment paper, that I place into the oil and this holds them together. You can then pull it out after a minute or so. If you're really devoted to kakiage and aiming for the perfect shape, you could buy a 'Kakiage Ring', a sort of ladel variant with a circular housing with mesh to its underside. I don’t have one myself. A little un-necessary, unless you’re opening a kakiage joint.
Traditionally the chef, cooking kakiage, will constantly rake the vegetable strands together with chopsticks, a long pair, to keep the clumps and shape them as they fry.
How do kakiage differ from Tempura? Tempura focuses on the use of a single ingredient, in its pure form - very Japanese! Kakiage however, are great for mixing batches of different veg and perhaps using up some leftovers. My favourites to cook with include carrot, sweet potato, burdock.
To serve, they go really well with grated daikon, which cuts through the oil (there shouldn't be too much of it, the oil that is). On the subject of oil, rice bran oil is great generally as it has a very high smoking point. The grated daikon will help with digestion and brings another key Japanese flavour to the dish.
RECIPE
Serves 2 people
Kakiage Ingredients
500ml Rice bran or vegetable oil
1/2 Small onion (25g)
1 Small carrot (30g)
1/4 of a Bell pepper (red here or any other colour!)
1 Stalk of celery
2 Spring onions
1/2 Sweet Potato (I use purple ones from the Asian Grocery) (30g)
Kakiage Batter Ingredients
2tbsp Rice flour for dusting
120g Rice flour
15g Cornflour
225ml of water, kept cold in the fridge.
2tsp Vinegar (I use rice vinegar or ACV, any type of vinegar is fine TBH)
1/2tsp Salt
Soba noodles Ingredients
150g Dried Soba (Udon noodles work well too)
600-800ml of dashi
4-6 tbsp of Kaeshi sauce
Garnish
3-4 spring onion or chopped chives
Seven spice “Nanami Togarashi” (optional)
METHOD
First prepare the Kakiage vegetable mixture. Thinly slice (julienne) all of the vegetables you have chosen to use. Lightly dust all of the vegetables with the flour. Put the vegetables into a bowl.
To make the batter, in a different bowl add the cornflour, rice flour and baking powder then mix well. Pour in the cold water mixing gently with chopsticks or a fork. Do not use a whisk, just mix well with a fork. Now, add the mixed vegetables to the batter and mix gently together.
Start to heat the oil for frying to 180ºC. A digital laser thermometer really helps to control the temperature and is a good, safe option.
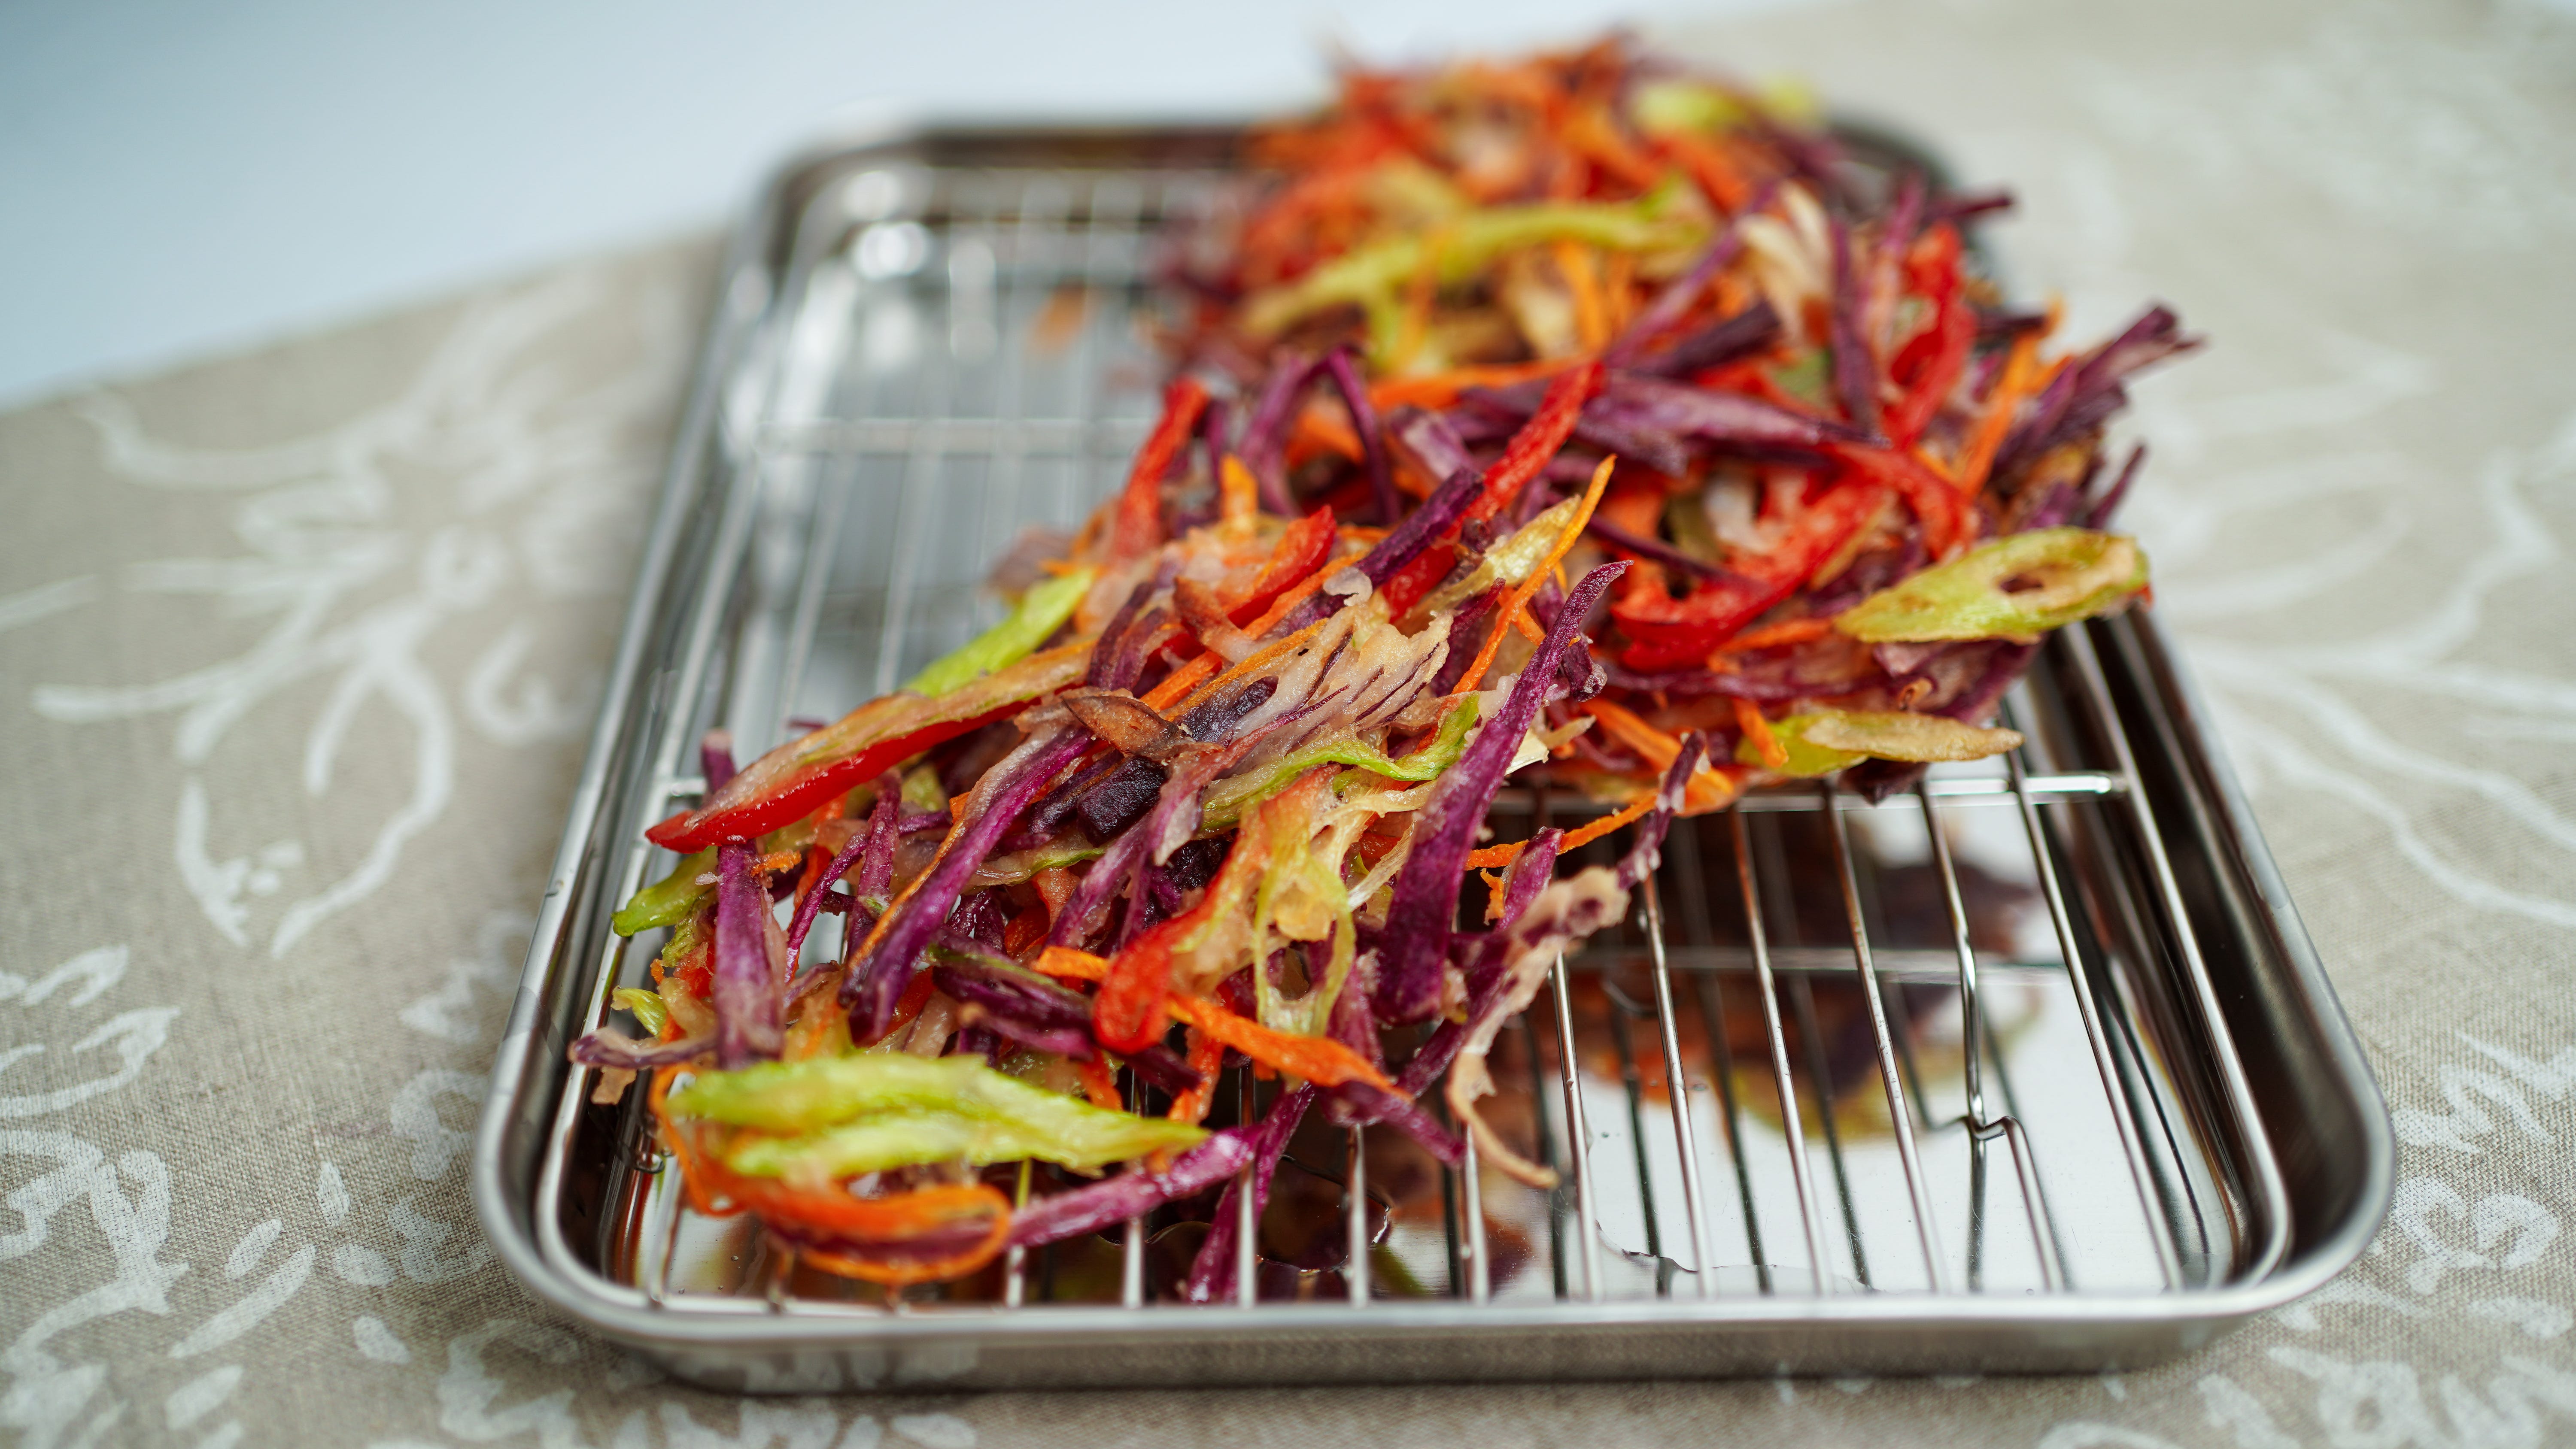
Cut the baking paper 12cmx12cm. Then take small batches of the vegetable mixture. Place it on the baking paper, then slide it gently into the oil trying not to let the vegetables drop from the paper. This is so they hold together. Do not touch them until they stick! Remove the paper form the pan very carefully, gently turn vegetables over with chopsticks or tongs. They take about 3-4 minutes to cook.
Remove from the oil, drain and place on paper towels.
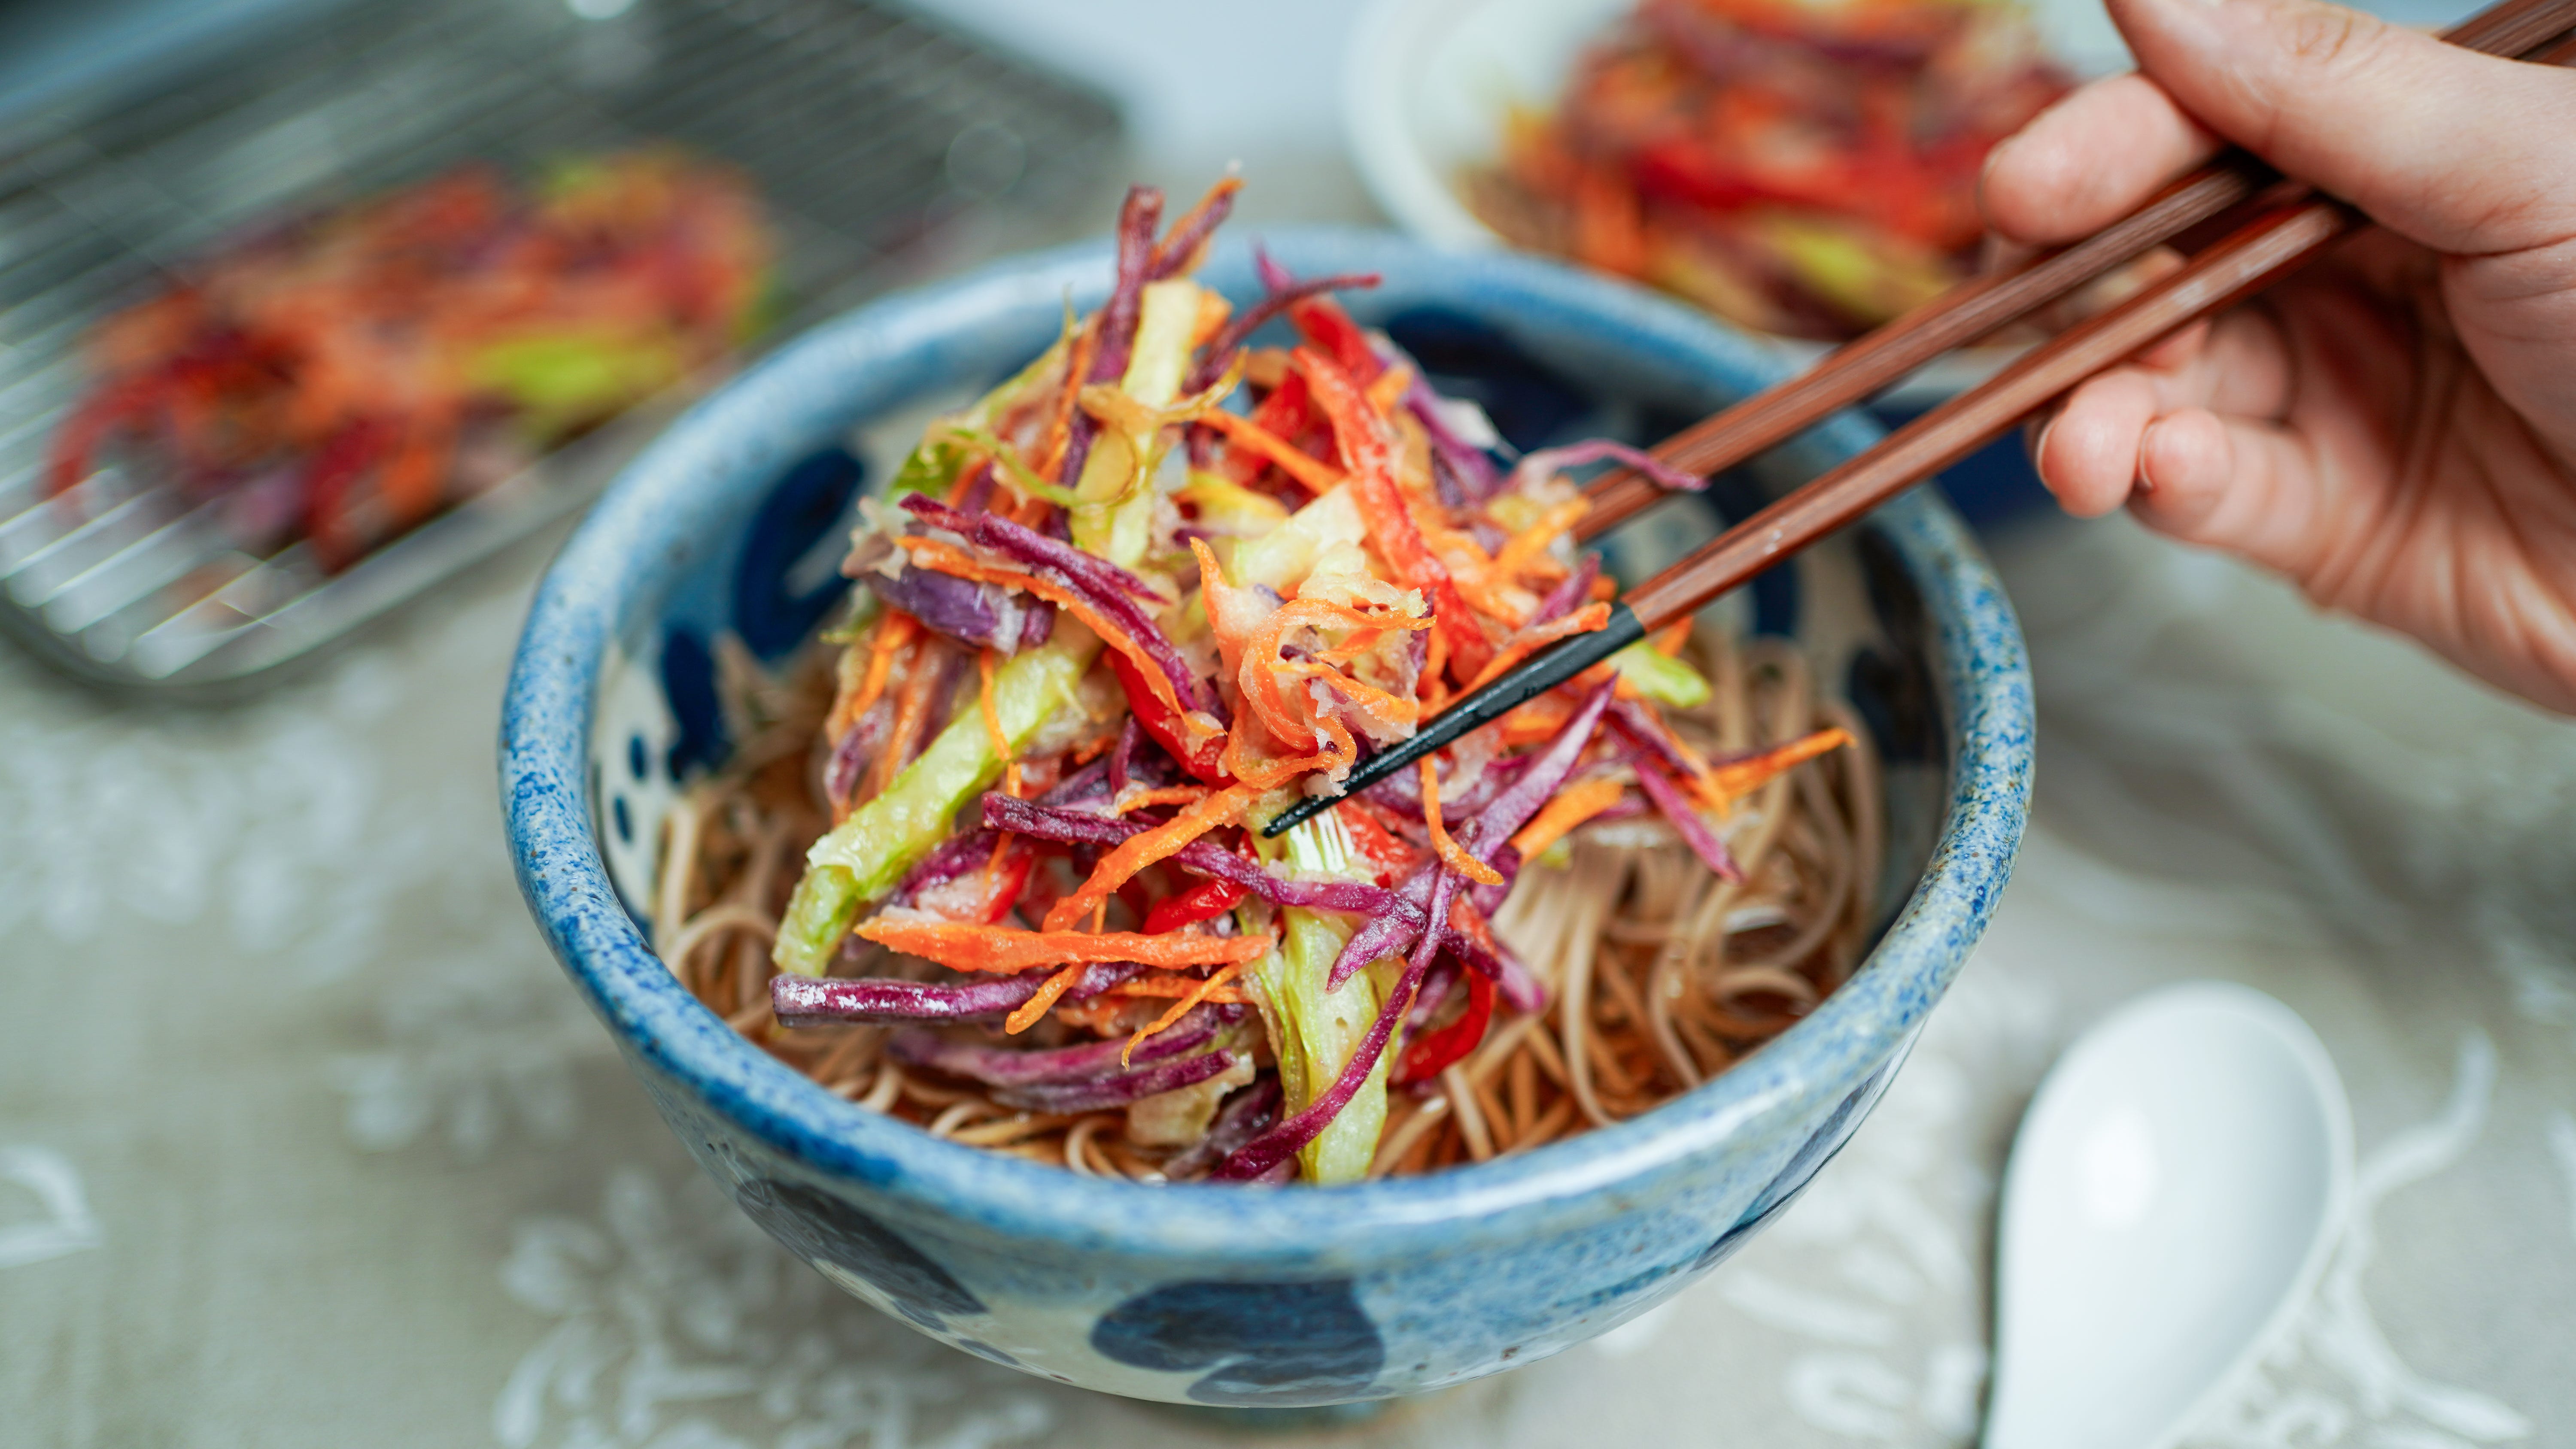
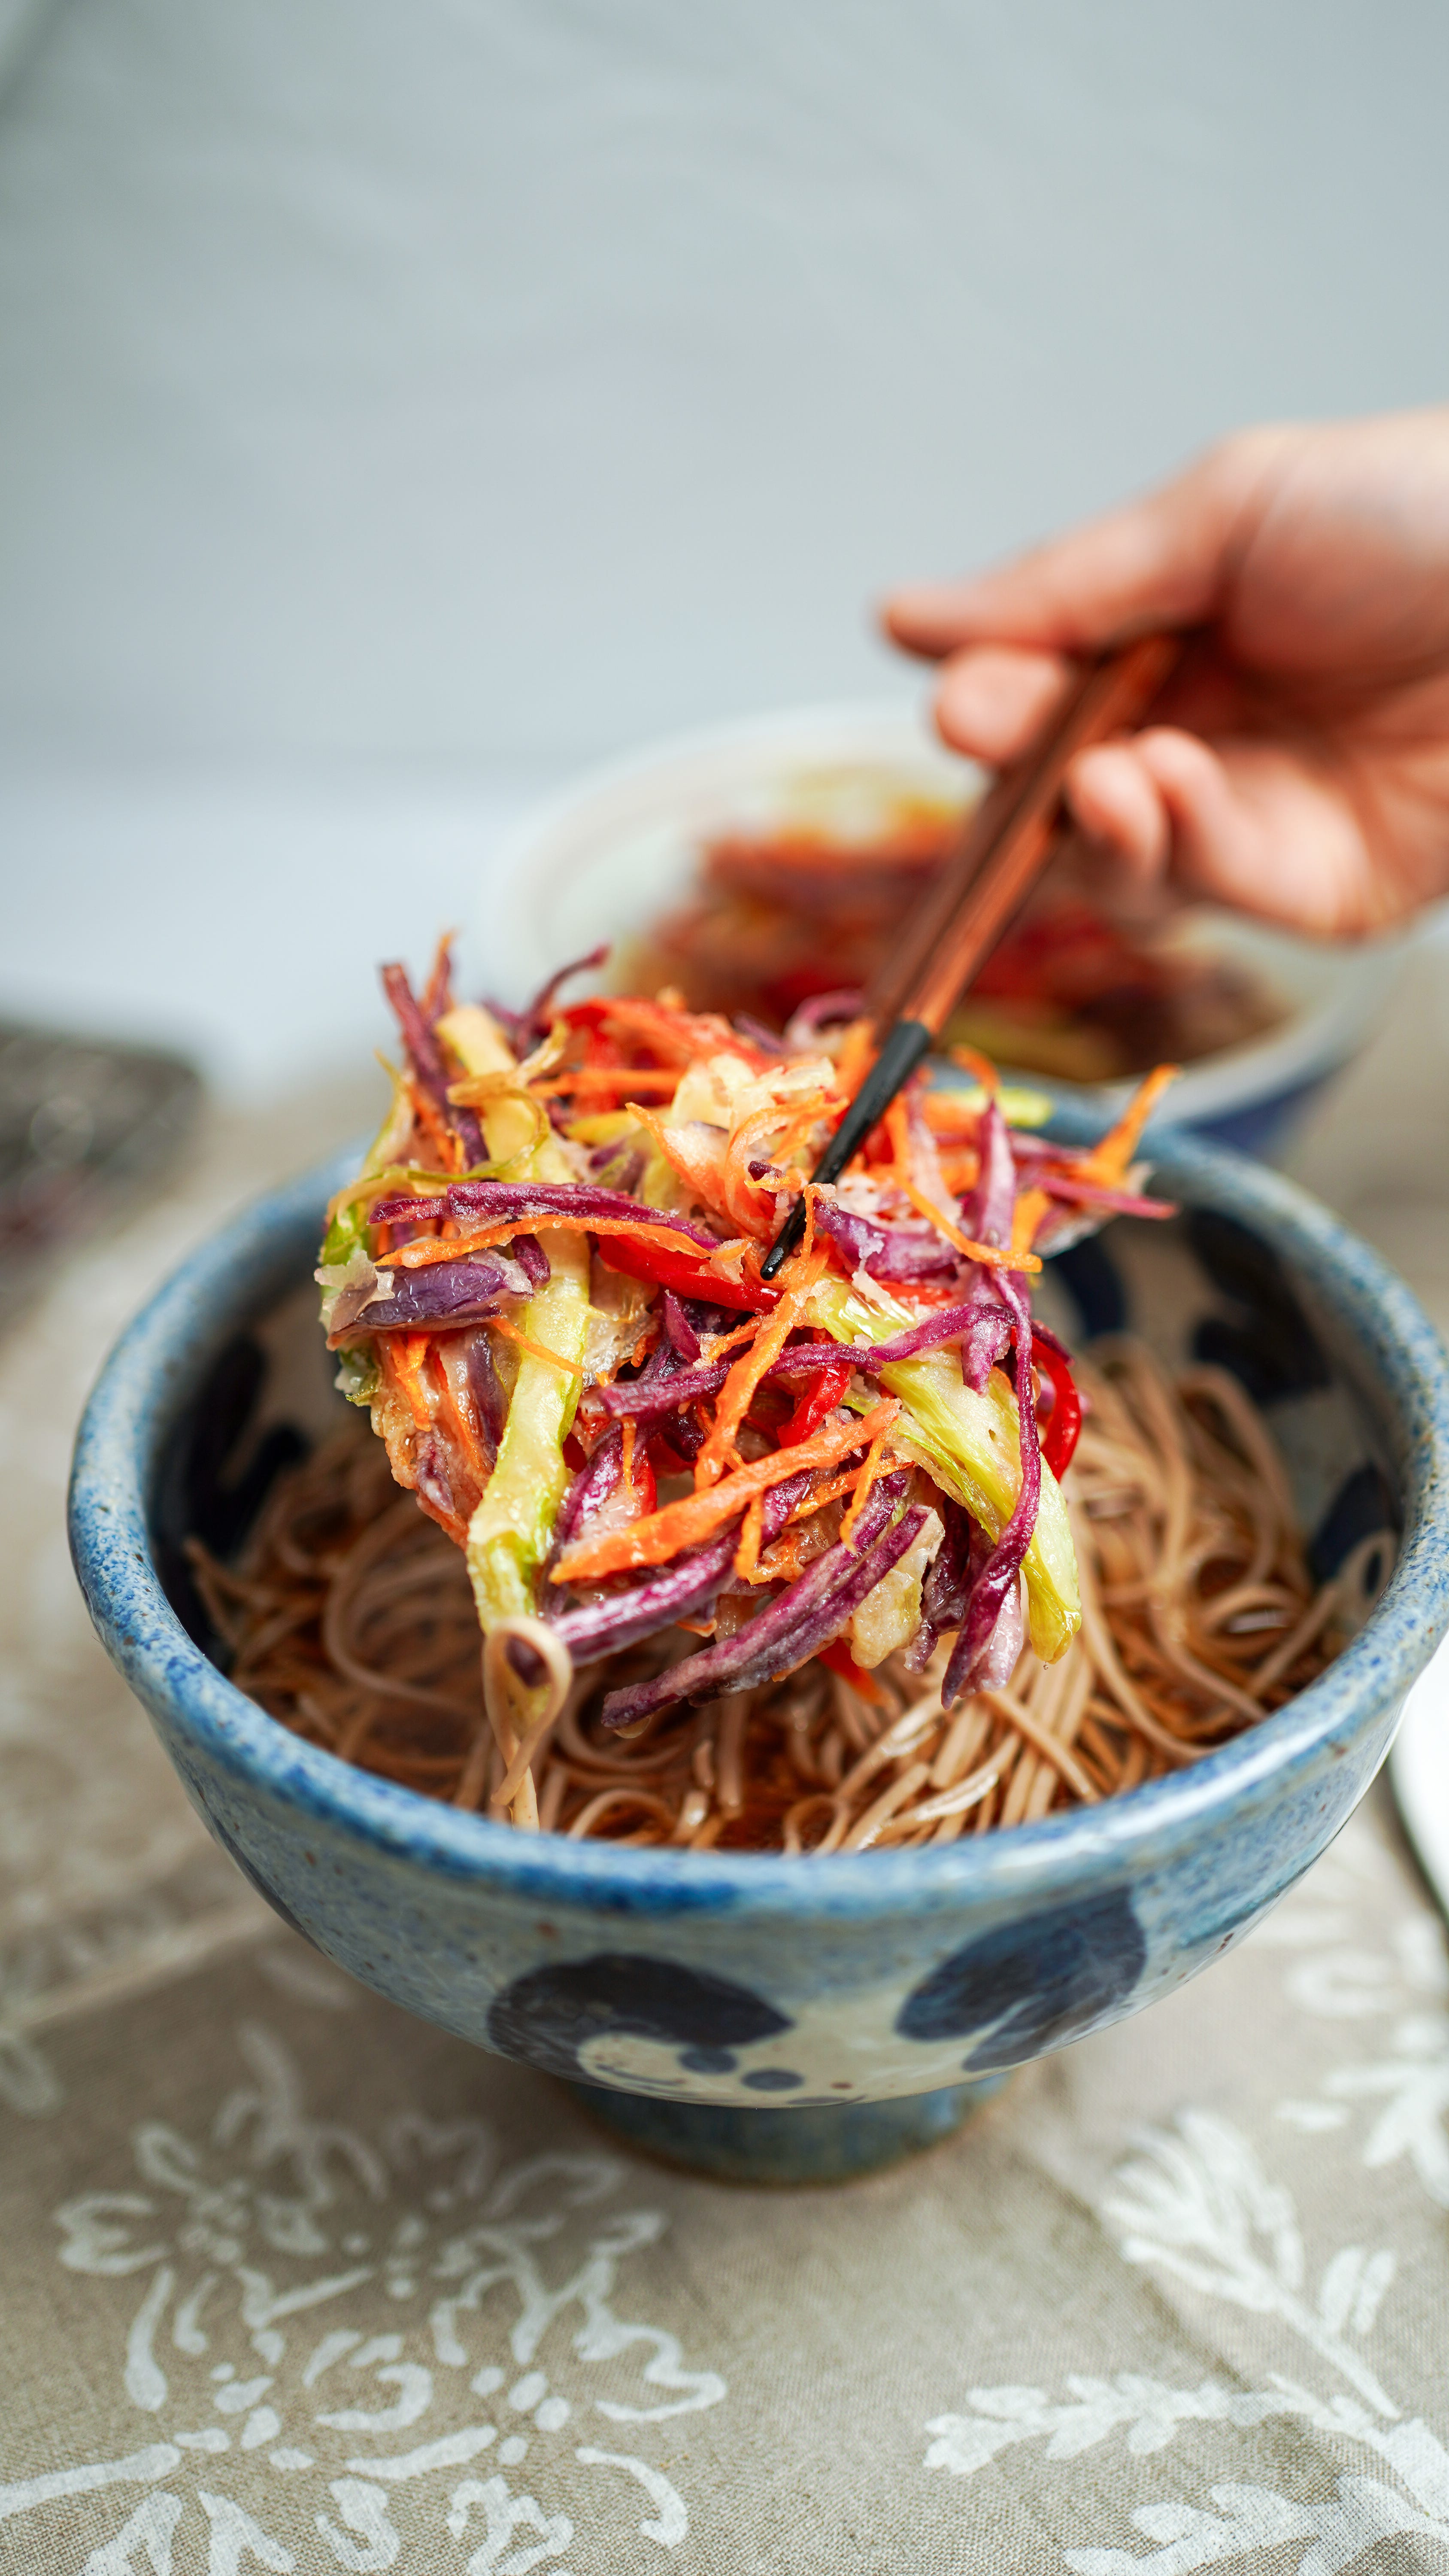
Serve with Japanese steamed rice or noodles. Normally they are simply placed on plain rice (Kakiage Don) or noodles (Kakiage Soba or Kakiage Udon).
METHOD - NOODLES
Using a big pot with plenty of water to cook the noodles. Bring it to the boil, then add the soba noodles. They normally cook in for 4-5 minutes. However, it depends according to the brand you are using, so check the packet instructions for exact times.
Add a small glass of water, as and if needed, when cooking the noodles to stop them foaming over. Then drain the water and rinse them under cold water to stop them from cooking further. Leave them to one side in the colander.
METHOD - PLATING & SERVING
Pour 300-400ml of hot dashi stock into each individual bowl. Add around 2-3 tbsp of Kaeshi sauce, adjusting it to your taste. Place the noodles into the serving bowl. Then place the kakiage on top and garnish with chopped chives, spring onions with a little seven spice powder if you fancy.
TIPS
You can use lots of different types of vegetables, herbs, red pepper, green beans, sweet potatoes, kabocha and shiitake mushrooms.
I would try this in restaurants. This sounds delicious.
Oh my... This one is amazing